Prototyping a Shmup with Godot
• in Prototyping
Greetings everyone! It had clearly been a bit since the first blog post in here (and I blame procrastination because that’s what I do the best!) but I’ve gladly got a prototype down using Godot!
Why Godot (And no, it’s not because of the entire Unity thing)
I used to use GameMaker: Studio in my earlier attempts at game development, and as enjoyable as it was, GMS2 happened to be paid which brought me to move to Unity, then followed by Godot. And while I didn’t get to do anything serious with Godot beforehand, I enjoyed it for a few simple reasons!
- Lightweight: I’m using Godot 3.5 alongside Visual Studio Code instead of the built-in editor, and the duo run like a breeze on my laptop.
- Pixel-perfect: The 2D section’s emphasis on (almost) pixel perfect units for positions reminded me of GameMaker’s and felt right at home. (I’ll admit that Unity’s unit system caught me off-guard and felt quite complicated back then, but that’s a rant for another time.)
- OOP…ish?: As much as I’m not a fan of Godot’s GDScript because of its lack of forced static typing (although that I try to emphasize it in my code.), I enjoyed the fact that OOP is available, and it allowed me to get several things done quicker.
Actually prototyping!
Prototyping the game didn’t take too long, several nodes allowed me to quicken up the development time and focus on the gameplay itself. (Something such as the parallax scrolling, which was entirely built-in and needed to code besides setting the scrolling speeds.)
One fun tid-bit in Godot is Custom Resources which I’ve used to create ‘pattern files’, so instead of hard-coding them, a pattern file is basically an array of resources, and every element in said array would be an ‘enemy resource’ that contains data such as the enemy type, position and extras.

The UI nodes were really quick to use as well, allowing me to mock up a very simple main menu and game over menu.
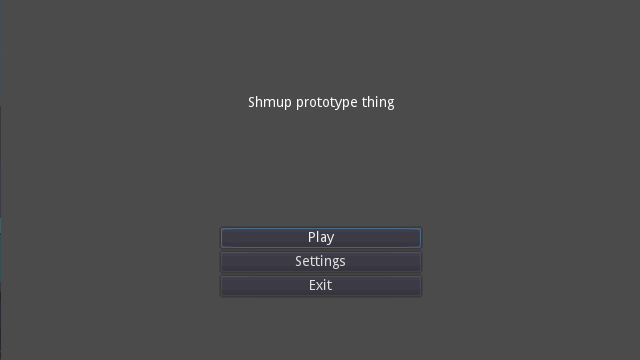
Main menu and options
Game over menu
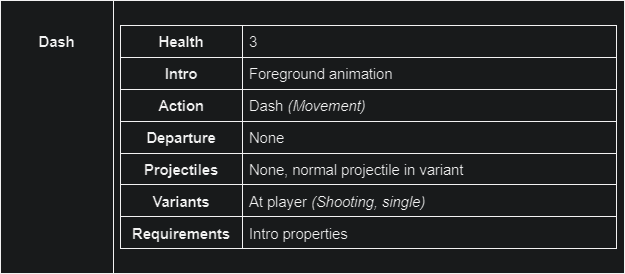
Making enemies went quite easily too! Creating a base class allowed me to turn the three phases previously mentioned in the ‘Enemy Design in Shmups’ post to methods and attributes that are easily mixed and matched in the inspector. (Save for the ‘Action’ attributes, these are written in a function per child-class) I did create a list of the enemy ideas before testing them in the engine and changing some values.
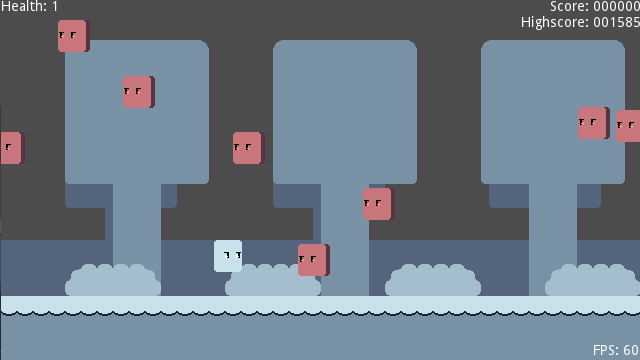
And eventually, with a proper game loop, I got a few patterns down to test the enemies! (although that they are quite lackluster in the game design department, but -cough- it’s a prototype. -cough-)

Gameplay sample
You can try the prototype in an HTML5 version on my itch.io page! I’m mainly looking to see how the player character feels, if the loop itself is broken/bugged and anything along these lines before I can dip back into further explorations on art, game design or sound. So consider sharing your feedback, thoughts and ideas!
Thanks for reading!